---
title: GitHub Actions Runner Setup (Deployment Guide)
url: https://www.velsof.com/devops/github-actions-runner-setup-deployment-guide/
date: 2026-06-14
type: blog_post
author: Sarvendra Singh
categories: DevOps, User Manuals
---
## GitHub Actions Runner Setup and Deployment Guide (Linux)
## Introduction
GitHub Actions is a CI/CD platform that allows you to automate build, test, and deployment pipelines directly from your GitHub repository.
A **Self-Hosted Runner** allows you to run GitHub workflows on your own server instead of GitHub’s cloud infrastructure. This is useful for:
- Internal deployments
- Access to private servers
- Custom environment configuration
- Reduced cloud usage cost
- On-premise DevOps environments
## Why Use a Self-Hosted GitHub Actions Runner?
Using a self-hosted runner gives you:
- Full control over infrastructure
- Faster deployments within internal network
- Secure deployment to private servers
- Custom software environment (Node, Python, Docker, etc.)
- Better performance for heavy builds
## System Requirements
- Ubuntu 20.04 / 22.04 / 24.04
- Minimum 2 GB RAM (Recommended 4 GB+)
- Sudo access
- Git installed
- Internet connectivity
- GitHub repository access (Admin permissions)
## Step-by-Step GitHub Actions Runner Installation
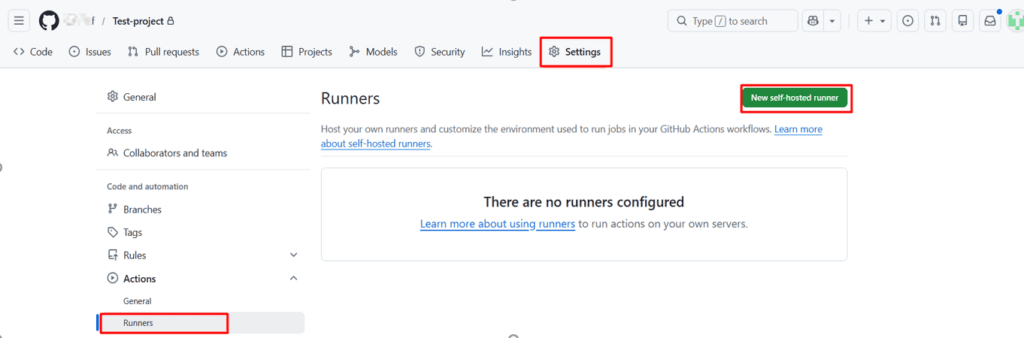
### Step 1: Log in to the GitHub Repository
1. Go to your repository.
2. Click **Settings**
3. Click **Actions → Runners**
4. Click **New self-hosted runner**
5. Select **Linux (x64)**
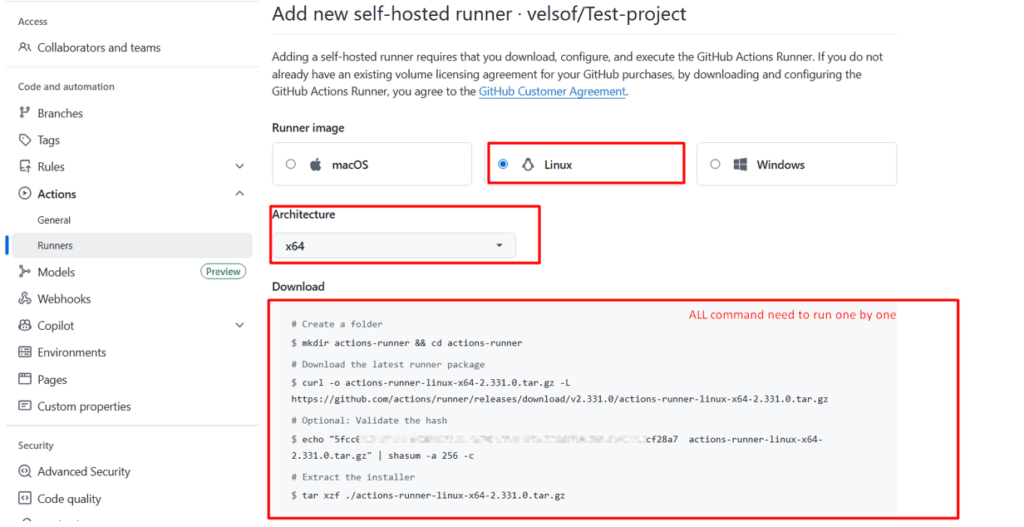
### Step 2: Create Runner Directory on Server
```
mkdir actions-runner && cd actions-runner
```

## Step 3: Download Runner Package
GitHub will provide a command similar to:
```
curl -o actions-runner-linux-x64-2.xx.x.tar.gz -L https://github.com/actions/runner/releases/download/v2.xx.x/actions-r
```

Extract the file:
```
tar xzf ./actions-runner-linux-x64-2.xx.x.tar.gz
```

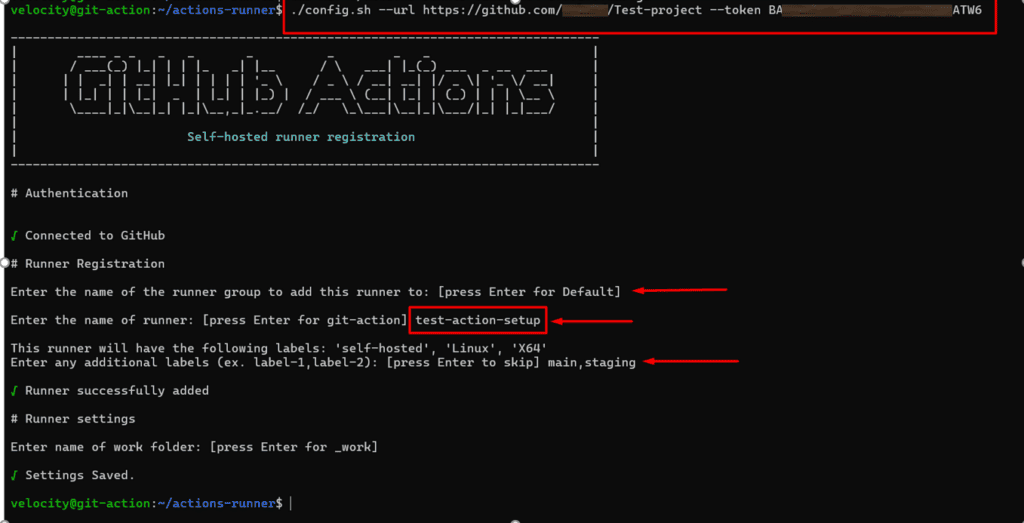
## Step 4: Configure the Runner
GitHub will provide a configuration command like:
```
./config.sh --url https://github.com/your-org/your-repo --token YOUR_TOKEN
```
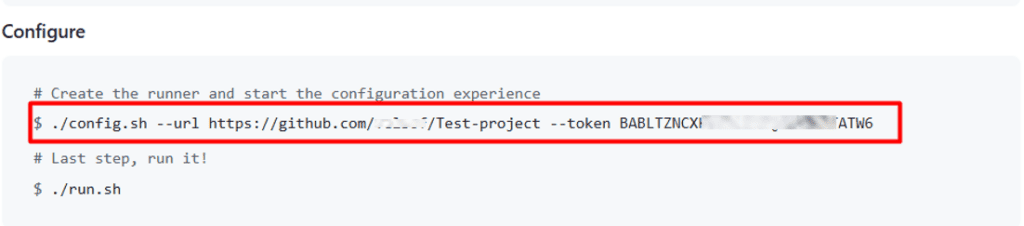
Follow the prompts:
- Enter runner name
- Enter labels (optional)
- Accept the default work folder
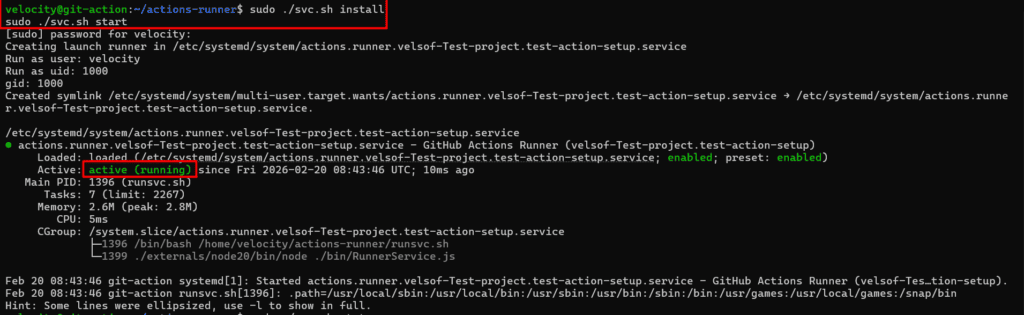
## Step 5: Install Runner as a Service (Recommended for Deployment)
```
sudo ./svc.sh install
sudo ./svc.sh start
```
Check service status:
```
sudo ./svc.sh status
```
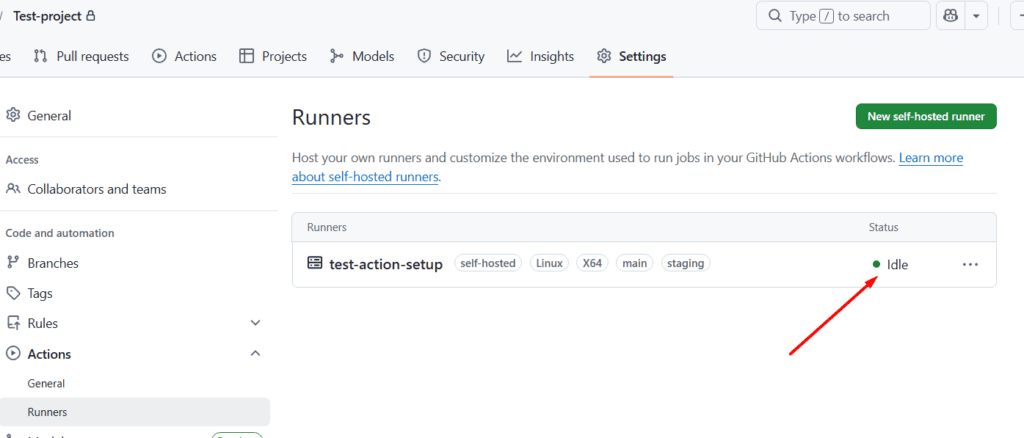
## Verifying Runner is Working
Go to:
Repository → Settings → Actions → Runners
You should see:
Runner status: **Online**/**Idle**🟢
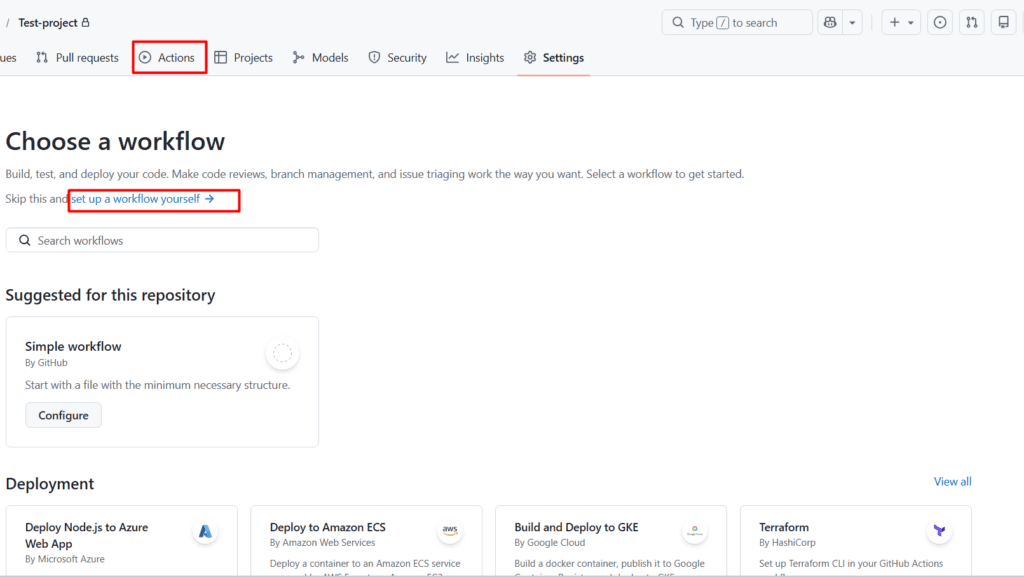
## Create Deployment Workflow
Create file:
```
.github/workflows/deploy.yml
```
Example deployment workflow:
```
name: Deploy Application
on:
push:
branches:
- main
jobs:
deploy:
runs-on: self-hosted
steps:
- name: Checkout Code
uses: actions/checkout@v4
- name: Pull Latest Code
run: |
cd /var/www/html/your-project
git pull origin main
- name: Restart Service
run: |
sudo systemctl restart your-service
```
## Common Deployment Use Cases
- Django app deployment
- Node.js deployment
- React frontend build & deploy
- Docker container deployment
- Auto-restart Gunicorn service
- CI/CD for internal projects
## Security Best Practices
- Use repository secrets for passwords
- Avoid hardcoding tokens
- Use limited sudo permissions
- Restrict server SSH access
- Rotate runner tokens regularly
## Troubleshooting
### Runner Not Showing Online
Restart service:
```
sudo ./svc.sh restart
```
## Permission Denied Error
Ensure correct ownership:
```
sudo chown -R $USER:$USER actions-runner
```
## Service Not Starting
Check logs:
```
journalctl -u actions.runner.*
```
## Uninstall GitHub Actions Runner
Stop service:
```
sudo ./svc.sh stop
sudo ./svc.sh uninstall
```
Remove configuration:
```
./config.sh remove
```
## Overall Summary
GitHub provides powerful automation through GitHub Actions, enabling seamless CI/CD pipelines. By setting up a **Self-Hosted GitHub Actions Runner**, organizations gain full control over deployment infrastructure, enhance security, and improve deployment speed within internal environments.
This guide covered:
- Runner installation on Linux
- Configuration and service setup
- Deployment workflow creation
- Security best practices
- Troubleshooting steps
After completing this setup, your server is fully integrated with GitHub CI/CD and ready for automated deployments.