--- title: "Barcode to Sheet – User Manual (Inventory Management & Google Sheet Barcode)" url: https://www.velsof.com/blog/barcode-to-sheet-user-manual-inventory-management-google-sheet-barcode/ date: 2026-05-07 type: blog_post author: Ambrish Khan categories: Blog --- > **Here’s a quick overview of Barcode to Sheet:****Barcode to Sheet** is an easy-to-use application that helps users scan barcodes and store the data directly into customizable sheets. It is useful for inventory management, tracking, and data collection. > > > **Versatile Use Cases** > > > To make your workflow smarter, consider these diverse applications: > > > **Field Data Collection:** Perfect for logistics and site inspections where data needs to be captured and synced instantly to a central database. > > > **Inventory & Warehouse Management:** Track stock levels in real-time, reducing manual entry errors and streamlining the replenishment process. > > > **Asset Tracking:** Manage company equipment, IT assets, or tools by scanning unique identifiers to see who has what, and when. > > > **Attendance & Check-ins:** Use it for event registration or employee shifts by scanning ID badges directly into a shared sheet. > > > **Retail Operations:** Quickly update prices, perform stocktakes, or manage incoming shipments directly from the shop floor. ## **Getting Started** ### **1.0 Login / Register** - Open the application - Register a new account or log in with existing credentials - Select your package (Standard / Pro / Enterprise) 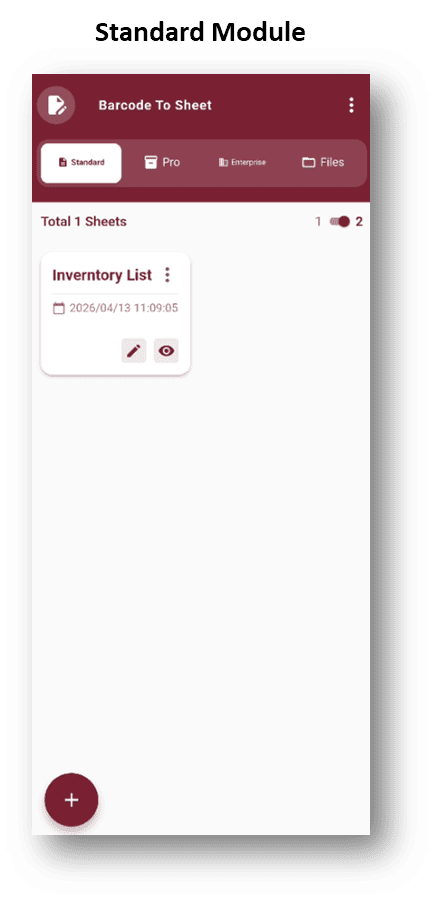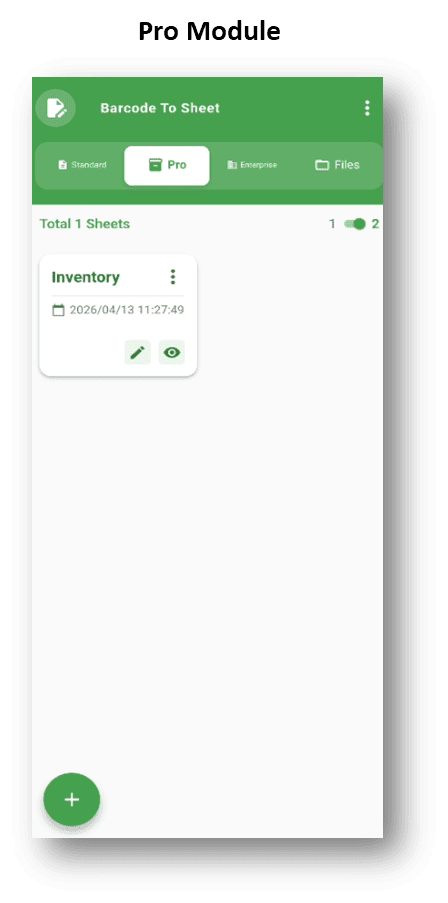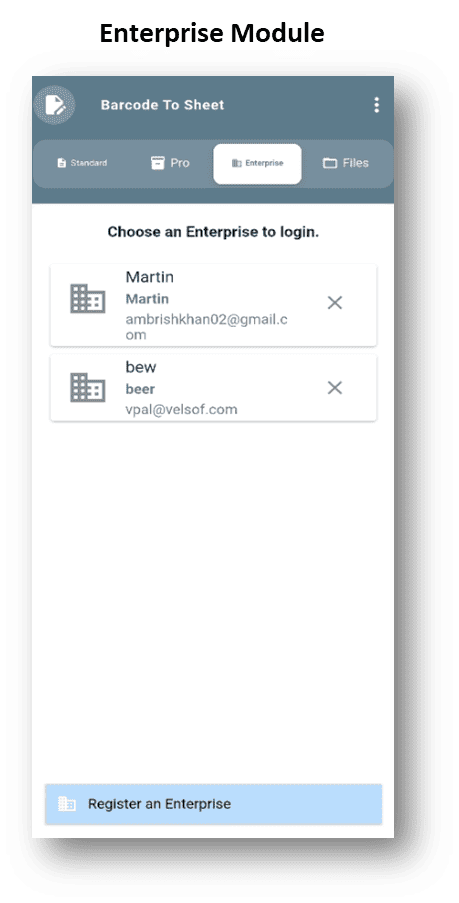 ### **2.0 Let’s Create Your First Sheet in Barcode to Sheet** **Getting started is simple:** 1. Click on **“+ Create Sheet”** 2. Enter a name for your sheet (for example: *Inventory List*) 3. Add the columns you want to track (like *Name, Quantity, Date*, etc.) 4. Select the type for each column 5. Hit **Save** — and your sheet is ready to use! 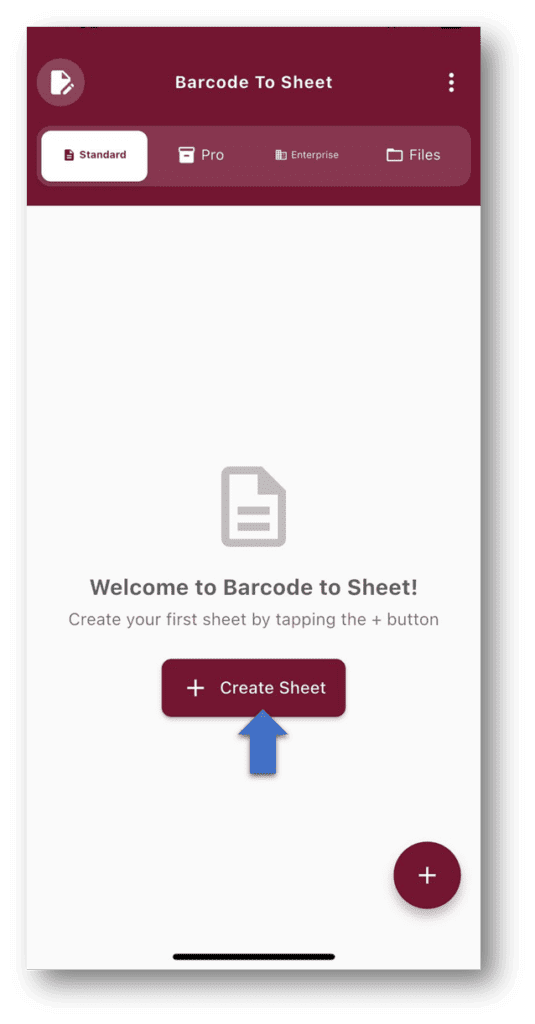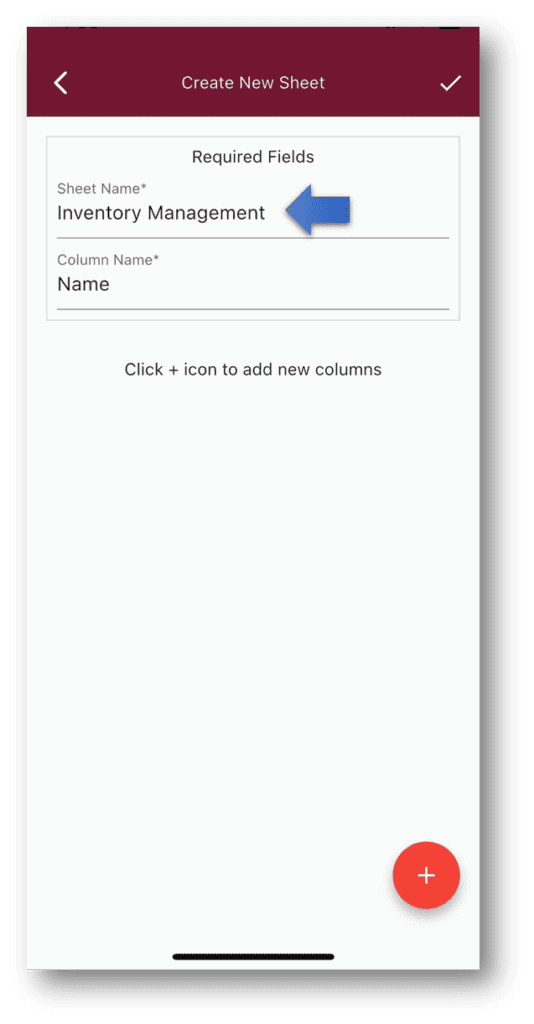 ### **3.0 Understanding Column Types** When you create a sheet in **Barcode to Sheet**, you’ll notice different column options (especially in the Pro and Enterprise modules). Here’s a simple breakdown: - **Text** → Use this for general information like names, IDs, or descriptions. It accepts letters, numbers, and symbols. - **Text (Not Null)** → Same as Text, but this field **cannot be left empty**. The user must enter a value. - **Number** → Only accepts numeric values (like quantity, price, or count). You can leave it empty if needed. - **Number (Not Null)** → Accepts only numbers and **must be filled**. Empty values are not allowed. - **Email** → Designed for email addresses. (In most cases, it should validate proper email format.) - **Email (Required)** → Same as Email, but the field must be filled and should follow a valid email format. - **Web** → Used for URLs or links. It can accept general text unless strict validation is applied. - **Web (Required)** → Requires a value and should ideally follow a proper URL format. - **Date (Selected)** → Lets the user manually pick a date from a calendar. - **Date (Autofill)** → Automatically fills the current date (and sometimes time) based on the device. - **Current Date** → Automatically captures the current date for new entries and is usually not editable. - **Time (Selected)** → Allows the user to select a time using a time picker. - **Drop-down** → Lets you create a list of options. Users can only select from the given choices. - **Radio Button** → Similar to drop-down, but options are shown directly for quick selection. - **Longitude** → Automatically captures the longitude (location coordinate) from the device. - **Latitude** → Automatically captures the latitude (location coordinate) from the device. - **Calculated** → Automatically calculates values based on rules you define 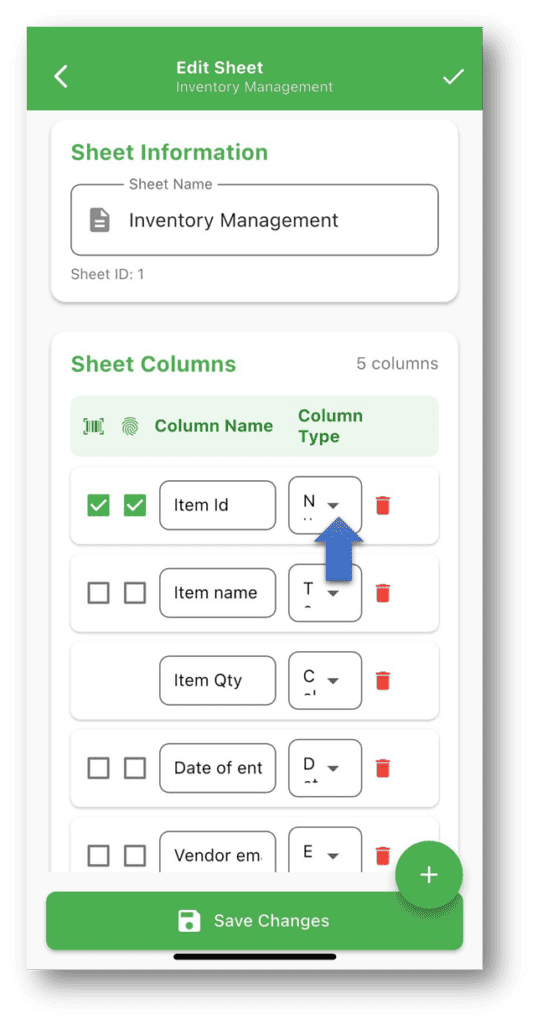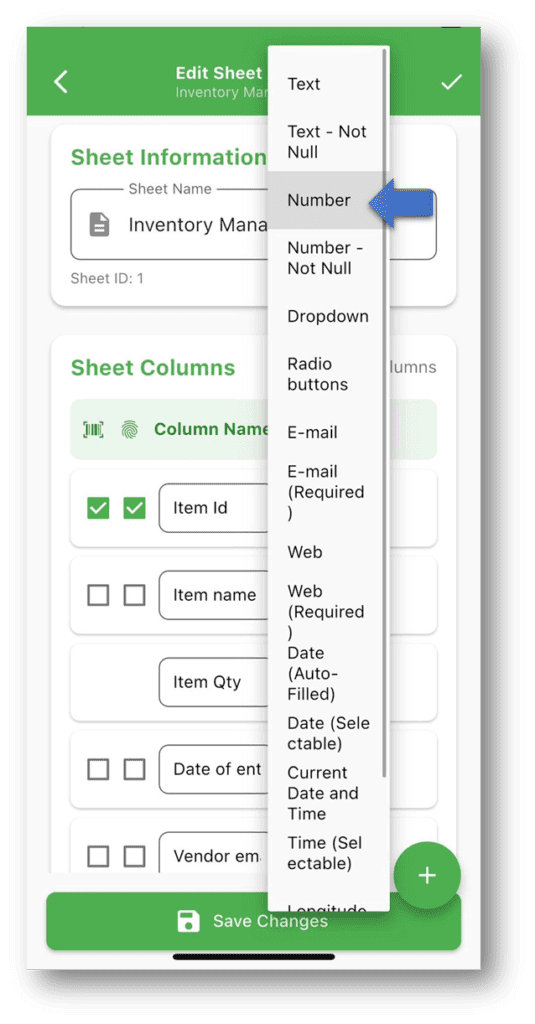 ### 4.0 Adding Data to Your Sheet Once your sheet is created: - Once your sheet is ready, filling it in is easy: - Open the sheet - You’ll see all the columns you created - Start adding data — either type it in manually or simply scan barcodes - Everything you enter is automatically saved and neatly displayed in a table - That’s it — your sheet is now populated and ready to use. Everything you enter will be saved and shown in a table. 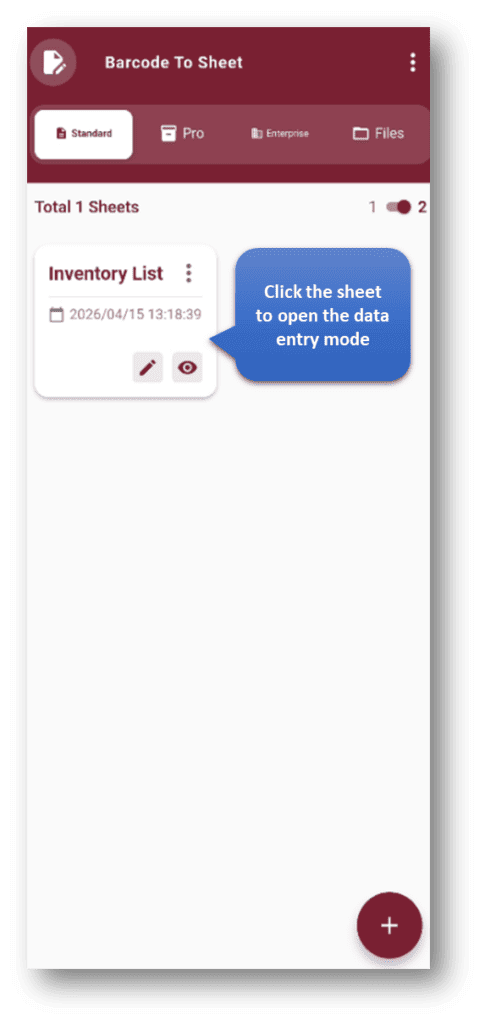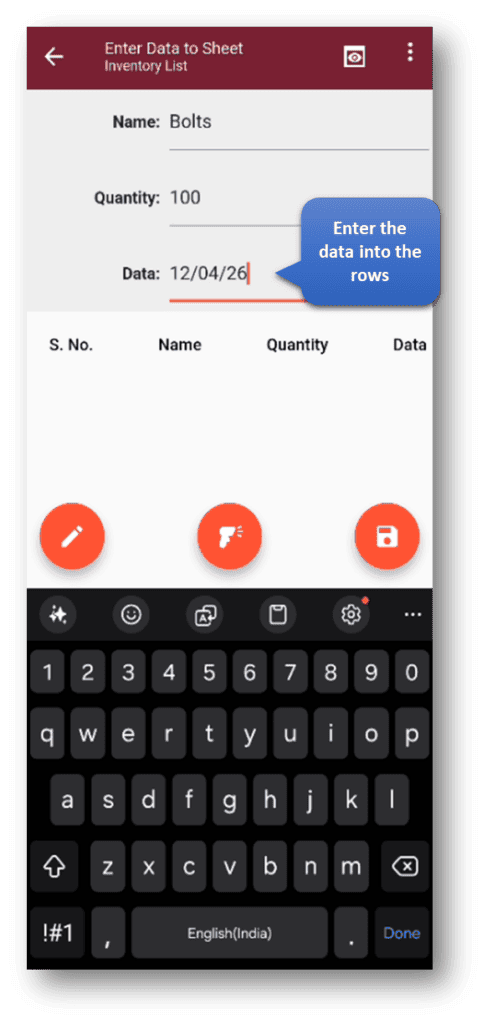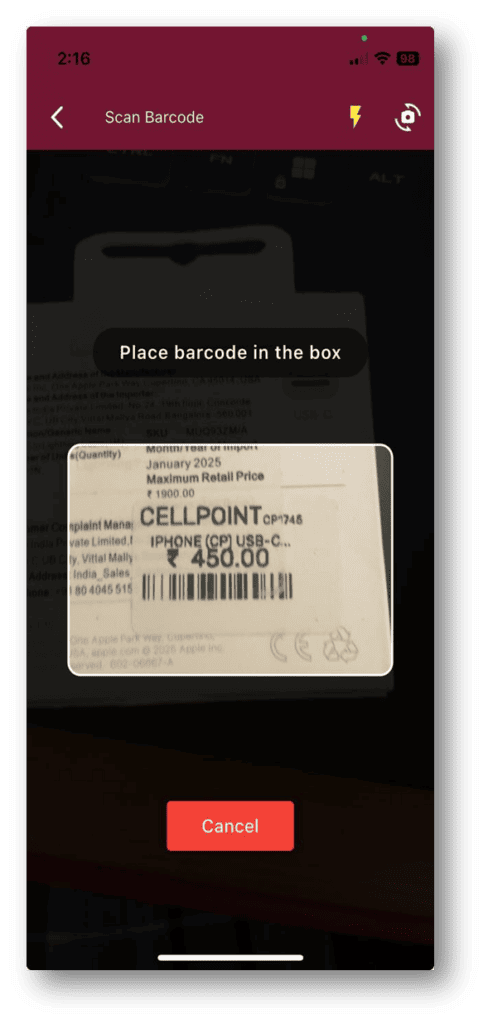 ### **5.0 Make a Field Unique and Scannable** - While creating or editing a sheet, simply tick the **Scannable** checkbox for a column. That way, whenever you reach that field, the app will automatically be ready to scan a barcode. - To make a field **Unique**, just tick the **Unique** checkbox. This ensures that no duplicate values can be entered in that column. It’s quick, simple, and gives you more control over how your data is captured. 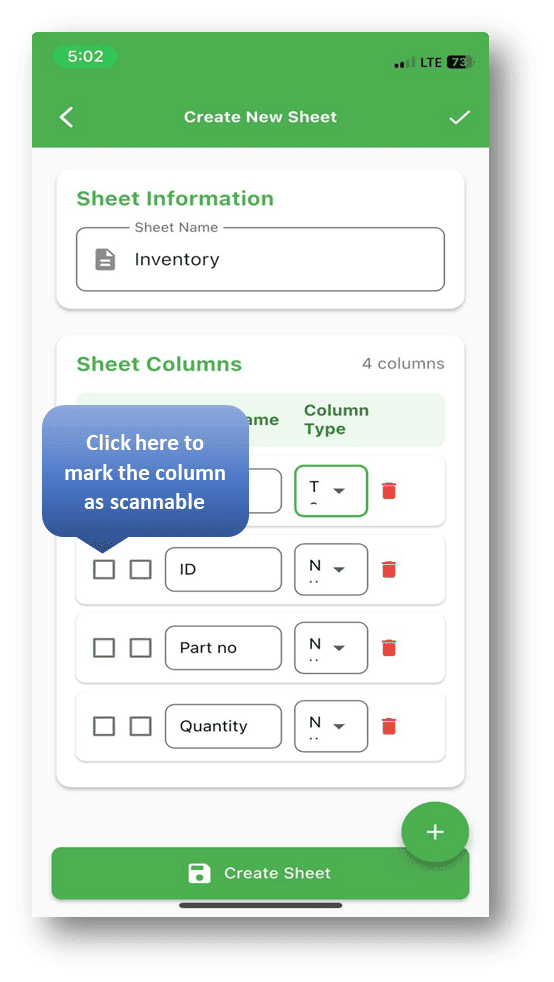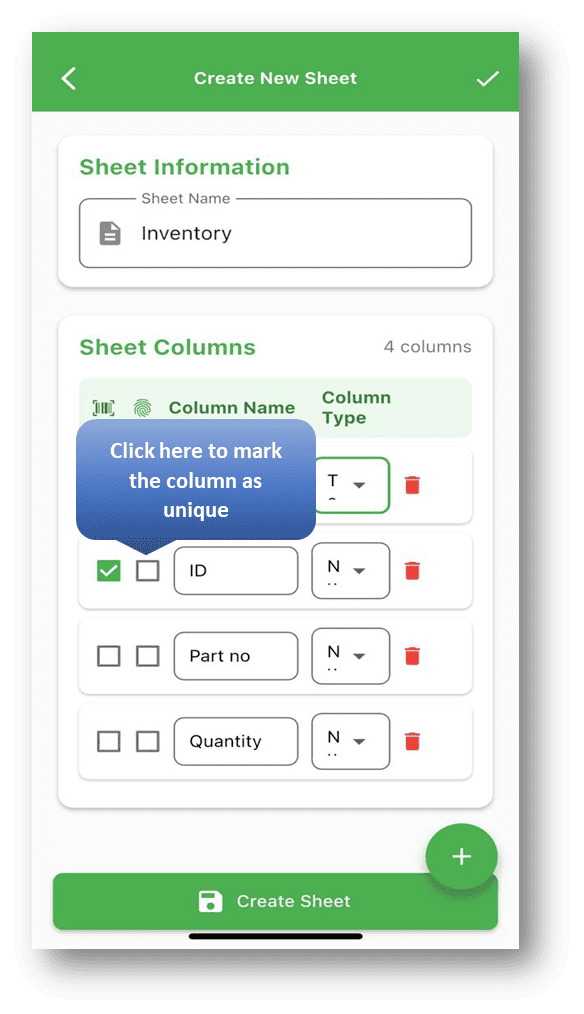 ### **6.0 Calculated Fields** This feature really saves time! - When creating or editing a sheet, you can mark a column as a **Calculated Field**. - Once you do, the system will prompt you to set up a calculation rule — you’ll define the rule, the value, and the dependent field (usually one that’s marked as **Unique** and **Scannable**). - Every time you scan a barcode for that field, the related data will be automatically calculated and updated based on your rule. Here’s how it works in practice: 1. Open your sheet 2. Switch to **Scan Mode** 3. Scan a barcode The barcode value will instantly fill into the scannable field, and your calculated field will update according to the rule you set. No typing required — it’s fast, accurate, and a huge productivity boost. 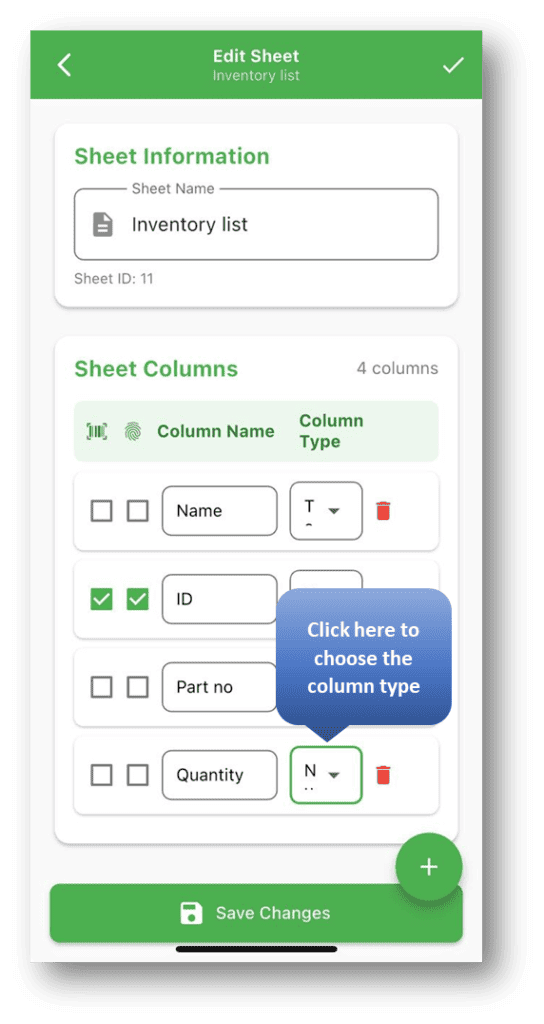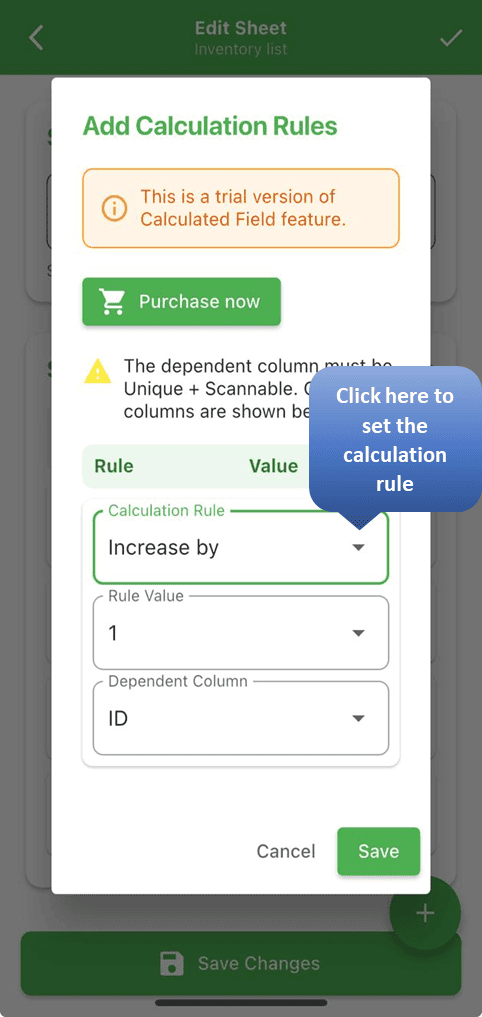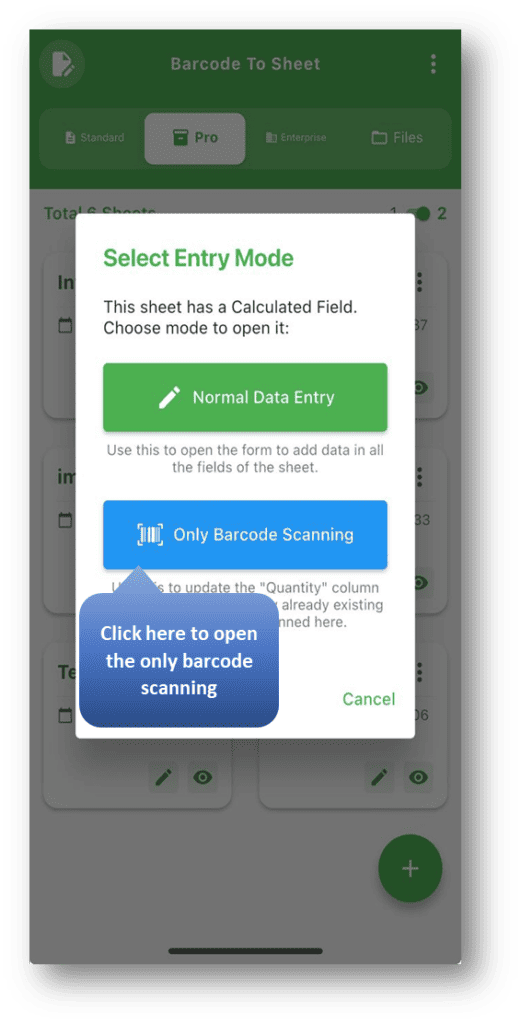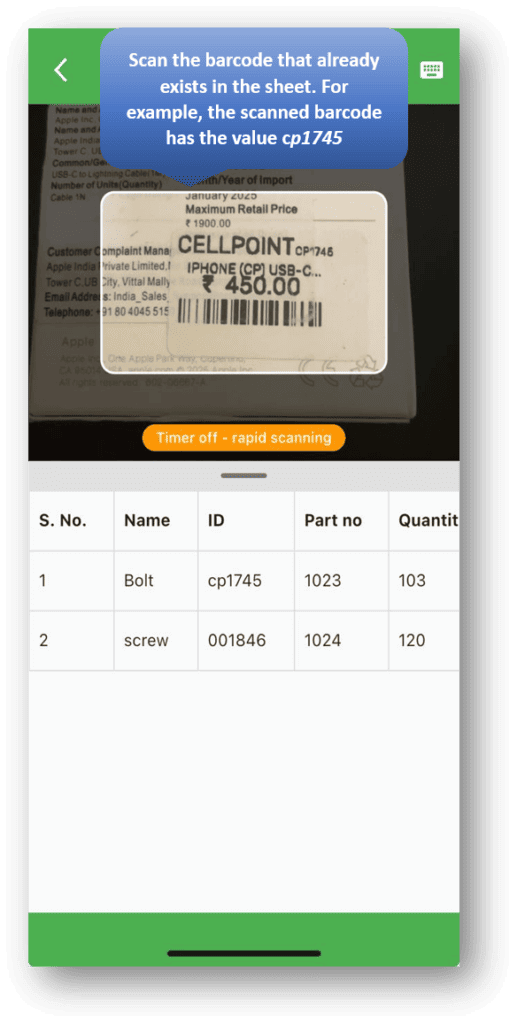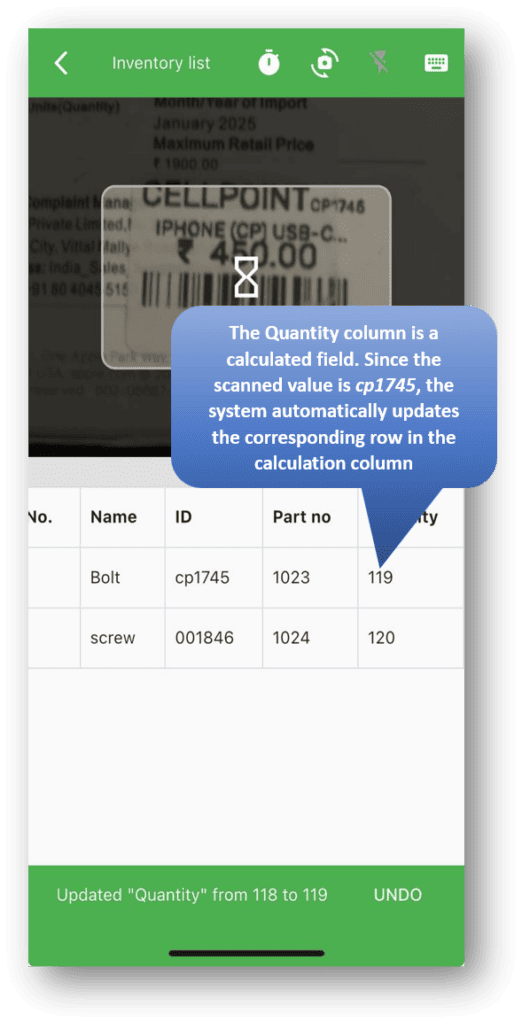 ### **7.0 Continuous Barcode Scanning – Quick Tip** There are different ways you can scan: - **Rapid mode** (off) → **Scan continuously without stopping** - **Interval mode** → **Adds a delay (like 1–10 seconds between scans)** If you’re scanning a lot of items, **Rapid mode is super useful**. 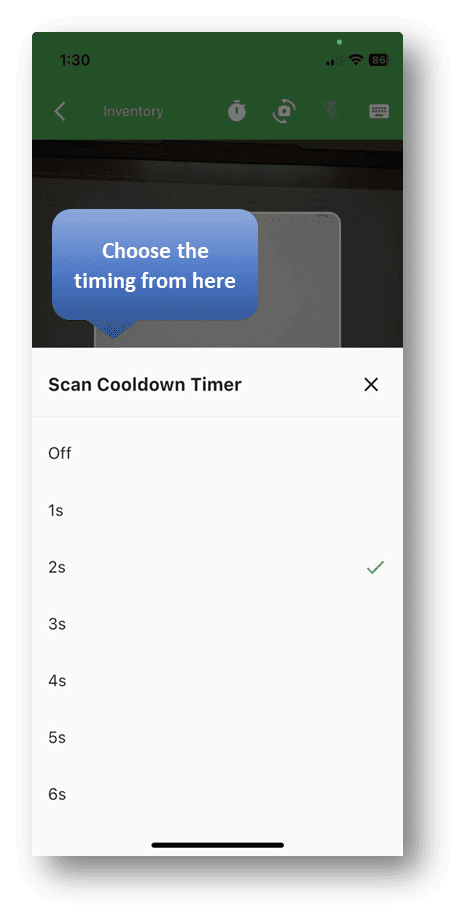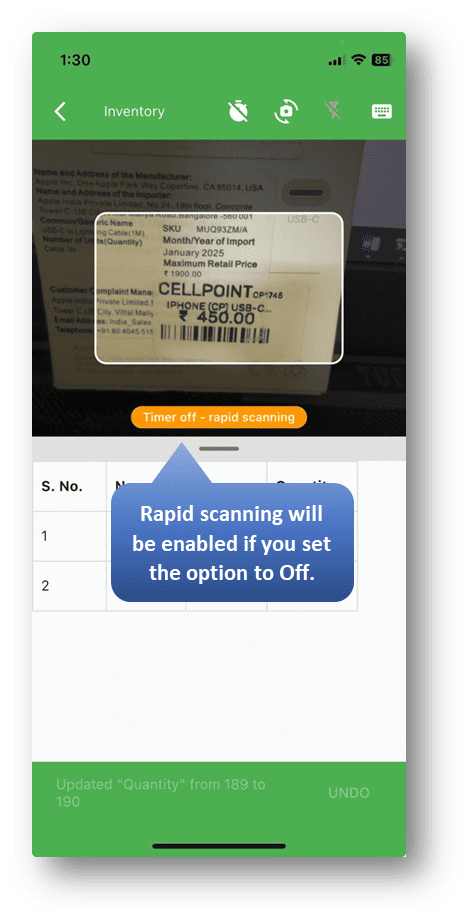 ### **8.0 Editing or Deleting Data** Need to make a change? It’s simple: 1. Open your sheet 2. Tap on the row you want to update 3. Use the **edit** icon to make changes, or **delete**the row if it’s no longer needed Your changes are saved instantly, so the sheet always stays up to date. 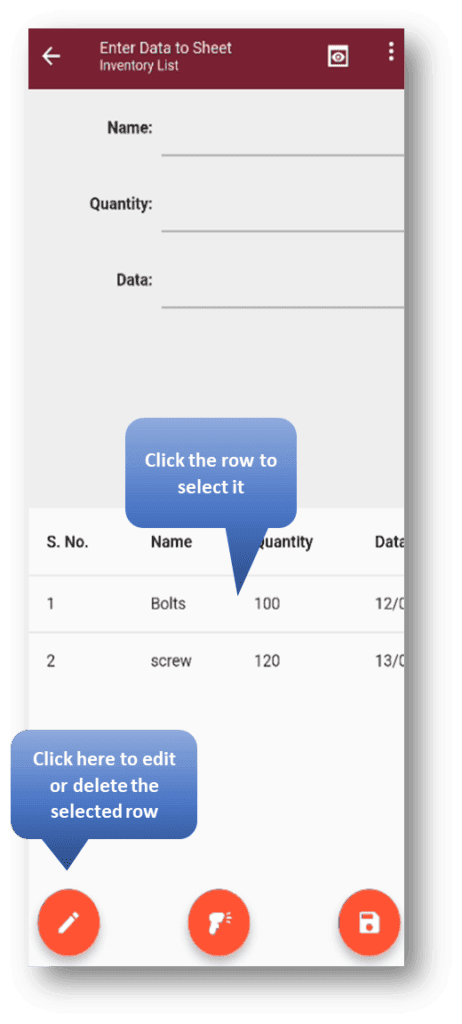 ### **9.0 Exporting and Sharing Data** Once your sheet is ready, you can easily share or export it: - Export as **CSV** - Export as **Excel** - Send via **Email** - Share using other apps **How to do it:** 1. Tap the **three dots** on the sheet to open the options menu 2. Choose the format you want to export 3. Select the export method or app Your sheet will be exported successfully, making it simple to use your data anywhere.  ### **10.0 Importing a CSV / Excel File** If you already have data saved in a file, you don’t need to create everything manually. You can easily import it into Barcode to Sheet. --- ### **11.0 How to Import a File** 1. Click on **“Create Sheet”** 2. Select **“Import CSV or XLSX”** 3. Enter: - **Sheet Name** - **Number of Colu**mns (if required) 4. Upload your file (CSV or Excel) 5. Click **Import** Your sheet will be created automatically with the uploaded data. 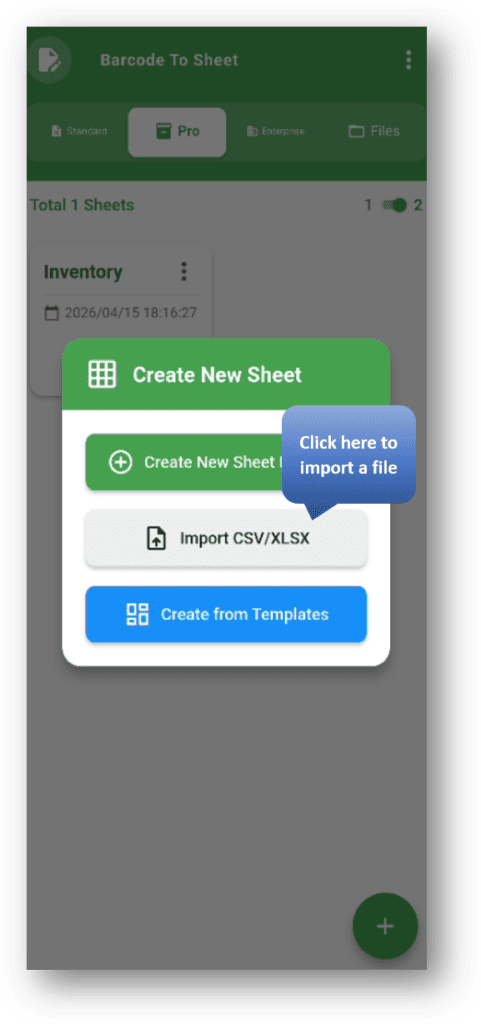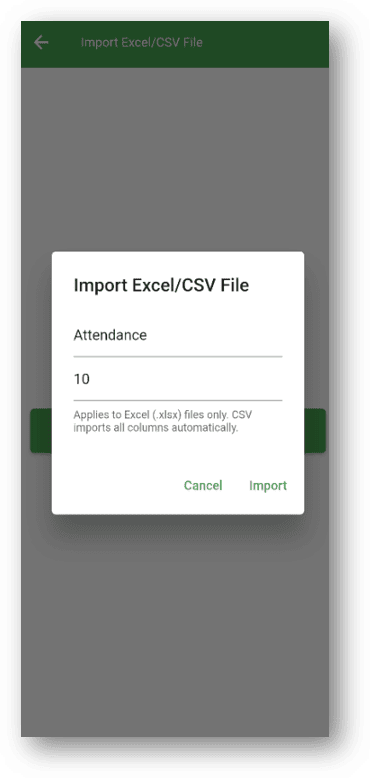 ### **12.0 File Module** - View exported files - Filter by name or format - Open or share files 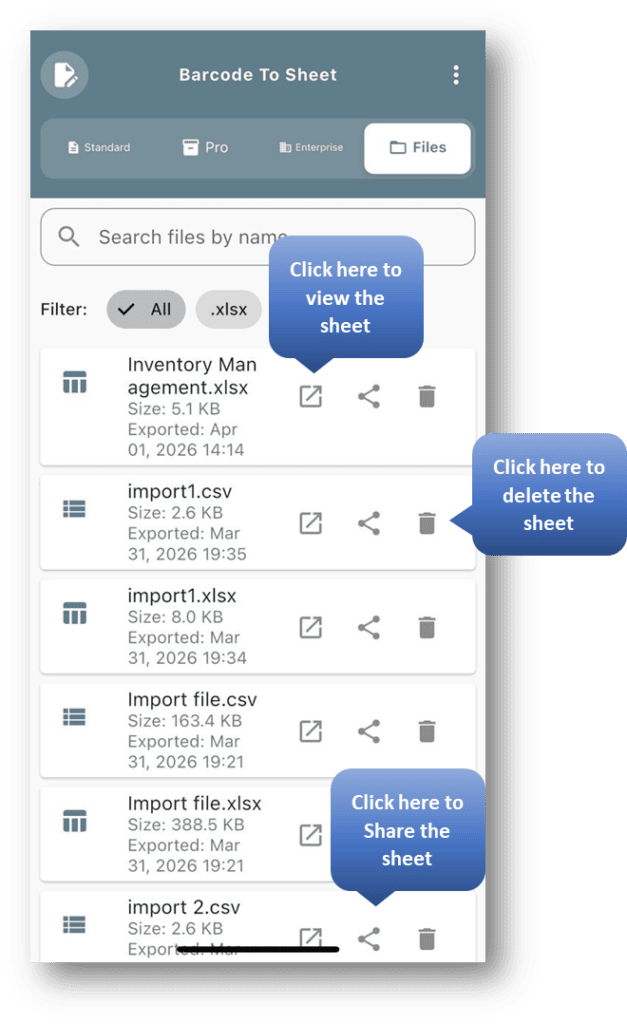 ### **13.0 Settings & Features** With the app, you can: - **Choose your preferred date format** - **Enable Left-Hand Mode** for left-handed users - **Turn on Torch/Flashlight** while scanning barcodes for better visibility - **Manage subscription plans** directly from the app - **Access Help & Support** whenever you need assistance These settings make the app more flexible, personalized, and easy to use. 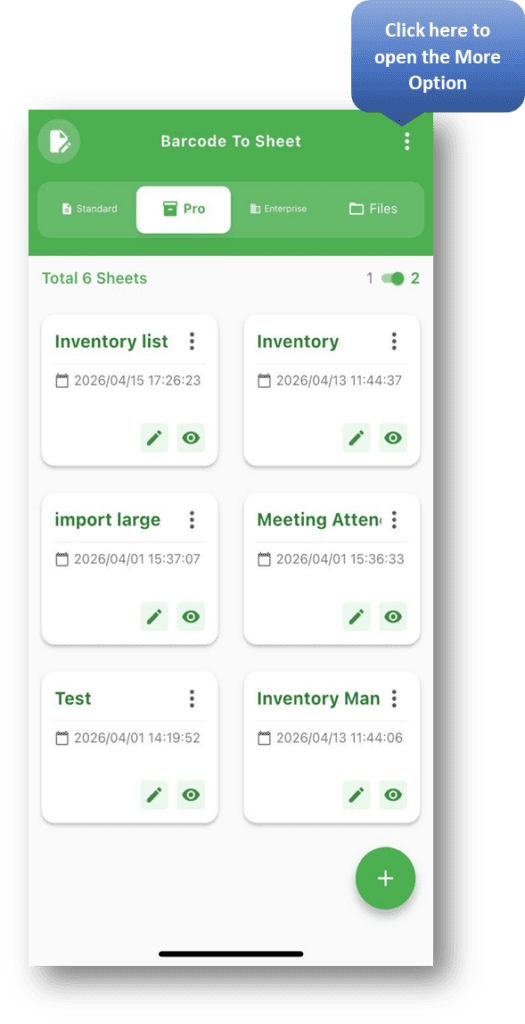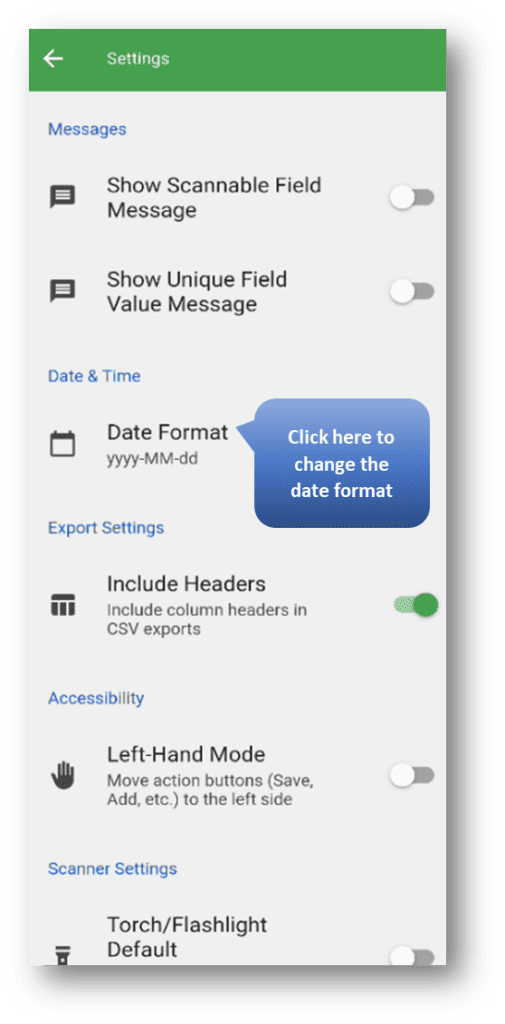 #### Enable Left-Hand Mode for left-handed users 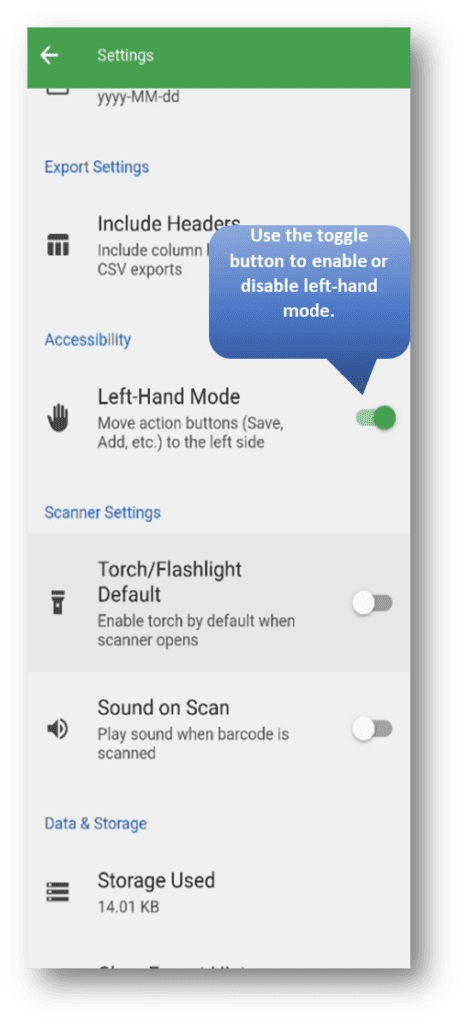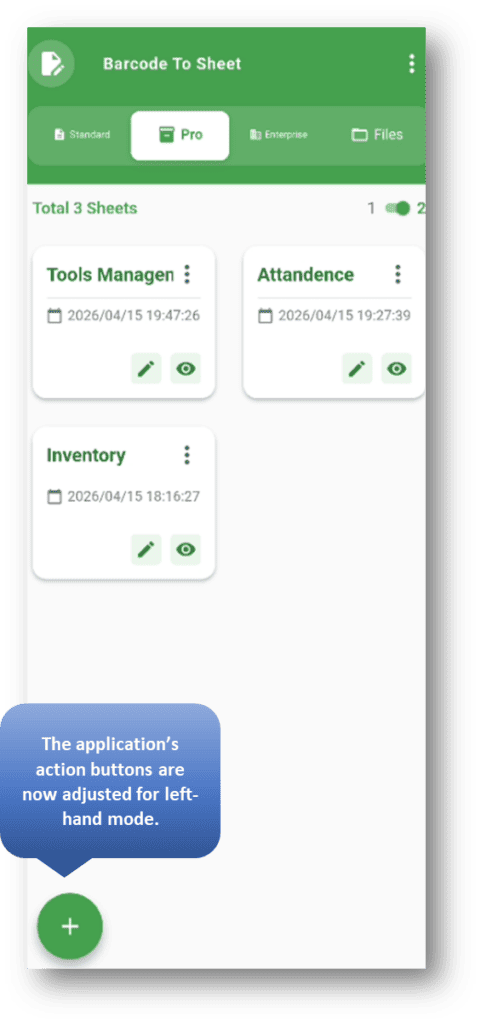 #### Turn on Torch/Flashlight 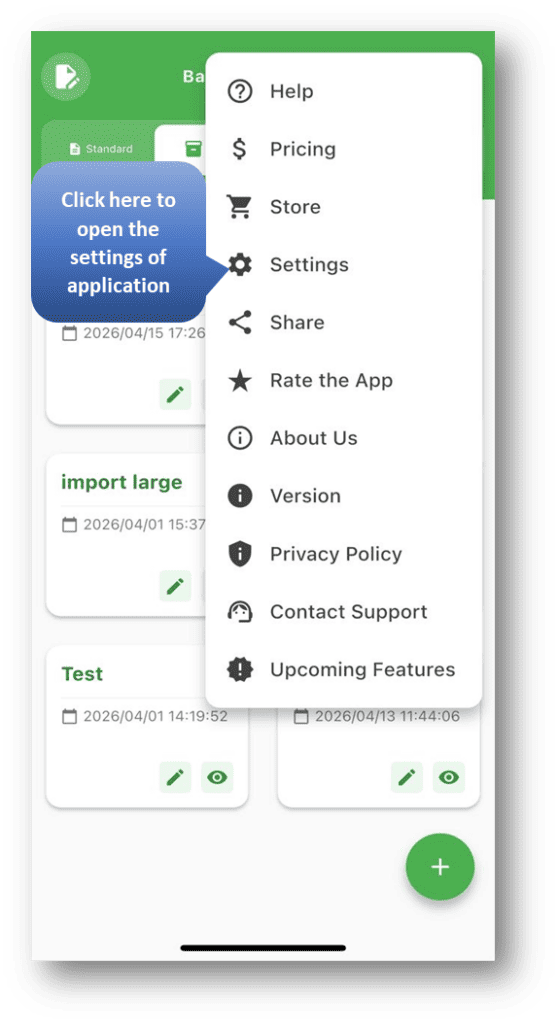 #### Manage subscription plans 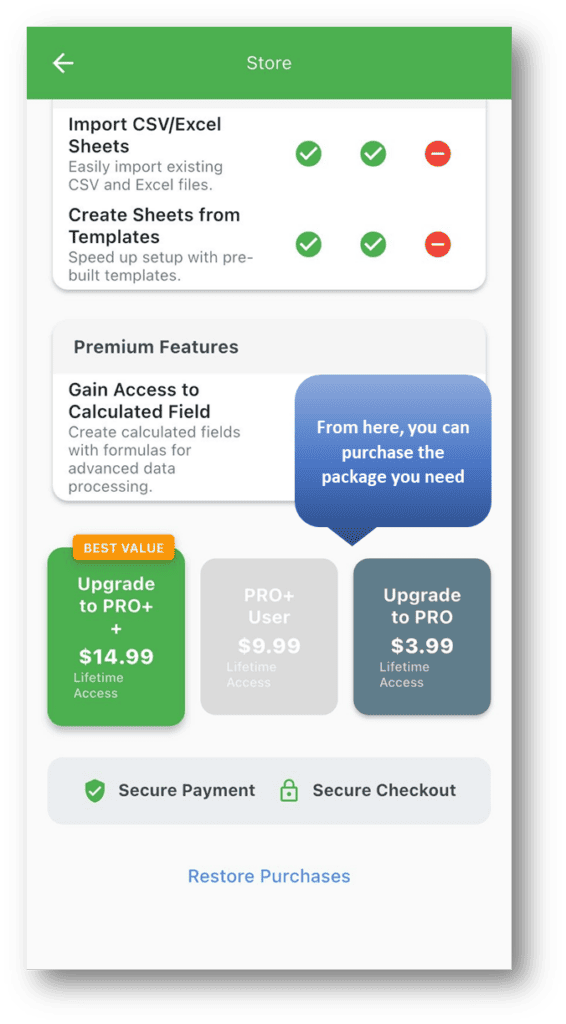 #### Access Help & Support 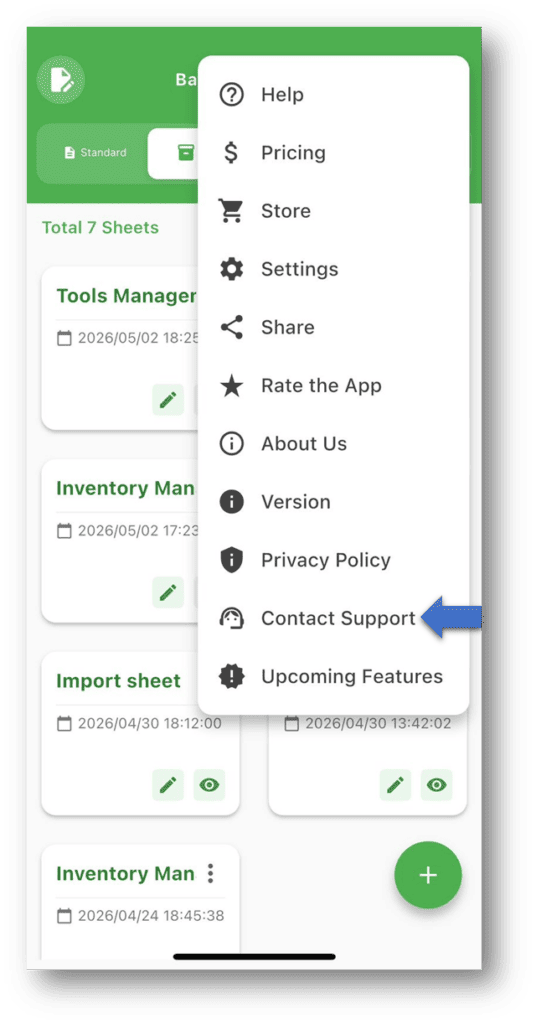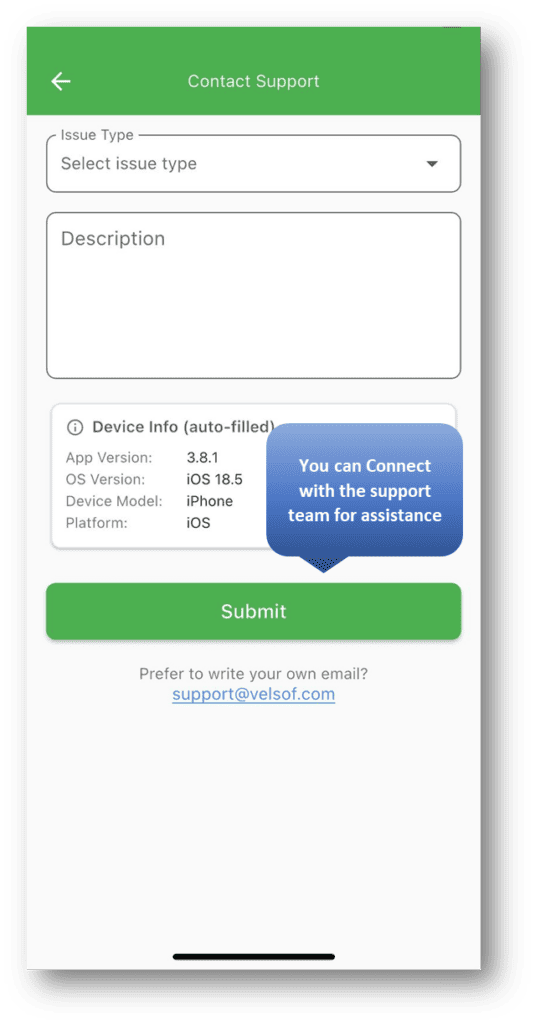 ### 14.0 **Barcode to Sheet – Module Comparison** 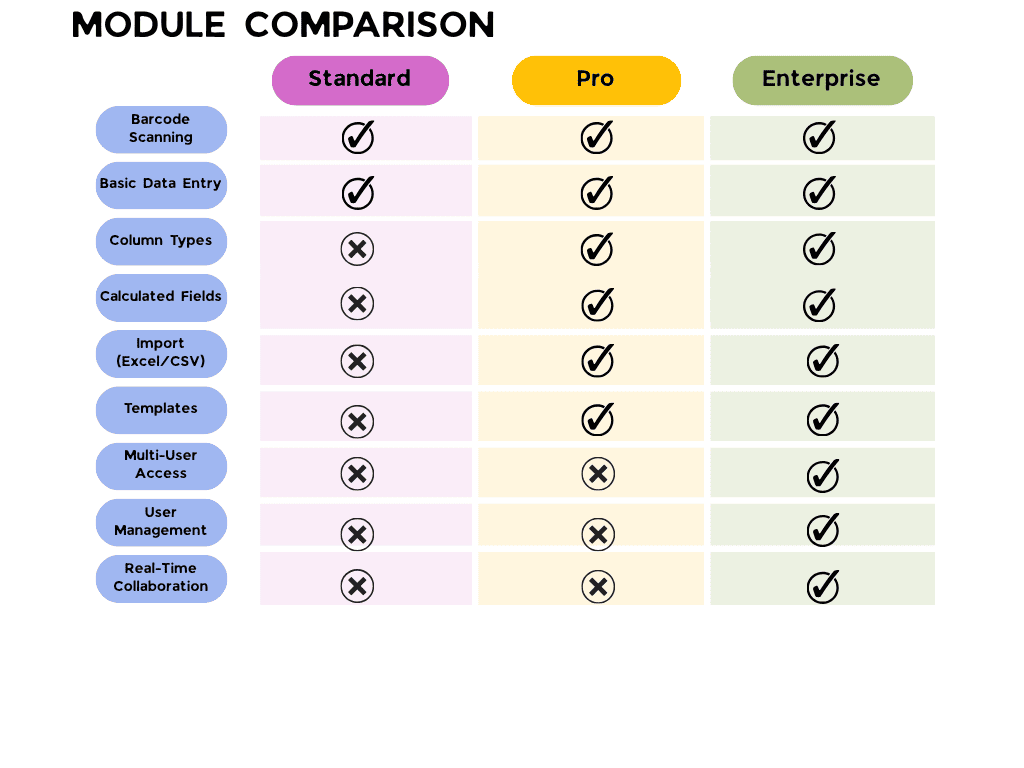 ### **15.0 Tips for Best Use** - Use **Unique columns** to avoid duplicate data - Use **Scannable fields** for faster entry - Use **Calculated fields** for automation - Regularly export data for backup Barcode to Sheet is made to make your work faster and easier. Once you set up your sheet properly, most of the work becomes automatic — especially with scanning. Start simple, try things out, and you’ll get comfortable very quickly. > **Try the demo for free** [**For Android**](https://play.google.com/store/apps/details?id=com.vel.barcodetosheet)[**For IOS**](https://apps.apple.com/in/app/barcode-to-sheet/id1327326217)