Install and configure phpMyAdmin on Linux in just 5 simple steps
Posted by Joe / April 11th, 2017 / No responsesAccessed from your website browser, phpMyAdmin is a PHP based control panel that is used to manage the MySQL databases. It can manage users, review SQL activity, export or import MySQL database backups, run queries and much more.
This tutorial will cover the easiest method to install phpMyAdmin on Ubuntu/Debian based Linux system or servers and how to configure it for the first use.
Step 1: Prerequisites before installing phpMyAdmin on Linux
Before we start installing the phpMyAdmin, we need to meet some basic requirements required by the phpMyAdmin:
LAMP stack- Please make sure that you have installed the LAMP stack (Linux, Apache, MySQL, and PHP).
To check if LAMP stack is installed on your system you can use the following commands on your Linux terminal:
For Apache:
- which apache2ctl
It will return the directory where Apache is installed if it is already installed:
- /usr/sbin/apache2ctl
For PHP:
- which php
It will return the directory where PHP is installed if it is already installed:
- /usr/bin/php
PS: If the command doesn’t return anything it means the software is not installed.
PHP version- Make sure your system runs the PHP 5.2.0 or the newer version.
To check the PHP version you can use the following command:
- php -v

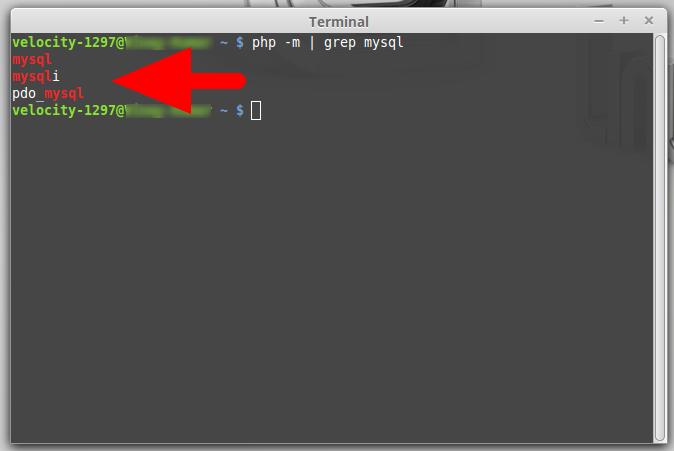
PHP MySQL or mysqlli extensions:
To check this you can use the following command line
- php -m | grep mysql
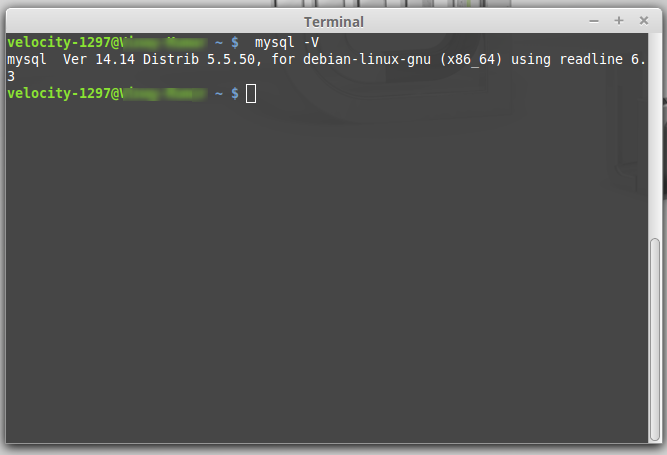
MySQL 5.0.1 or new
To check the MySQL version you can use the following command:
- mysql -v
Step 2: Update Package Index
The Ubuntu or Debian repositories always have the latest stable release of phpMyAdmin. We have to first make sure our local server is receiving the latest available updates. So, we will run a command to update our local server for latest updates now:
- sudo apt-get update
Step 3: Installing phpMyAdmin Package
Now, when we are certain that our local server is getting the latest updates, we are ready to run this command to install the latest version of phpMyAdmin
- sudo apt-get install -y phpmyadmin
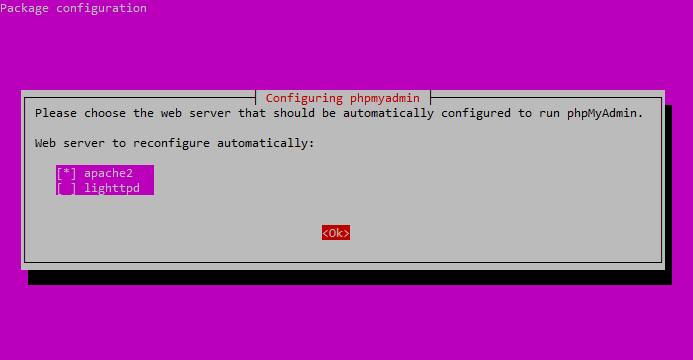
Step 4: phpMyAdmin Package Configuration
After the installation is complete, you will be shown the package configuration interface.
- Press the SPACE bar to bring the “*” by the side of “apache2”
- Now, Press TAB and it will highlight the “OK” button. When “OK” button is highlighted, hit ENTER button
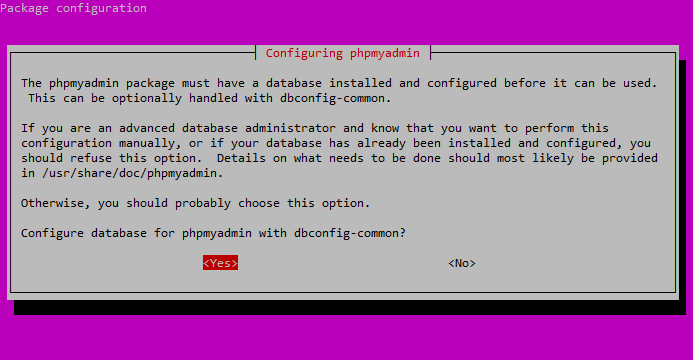
- The process will continue on its own after that. Until you will be shown with another configuration screen. Here. Select “Yes” and Press the ENTER button
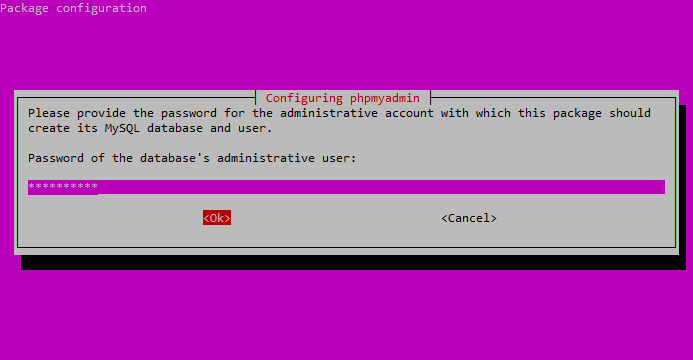
- Now, you will be asked to provide your database administrator password. Provide the same and Press TAB to highlight the “OK”. Once it is highlighted, hit the ENTER button.
- Now, you will be asked to provide the password for your phpMyAdmin. Provide a new password here. After that highlight, the “OK” using TAB button and hit ENTER.
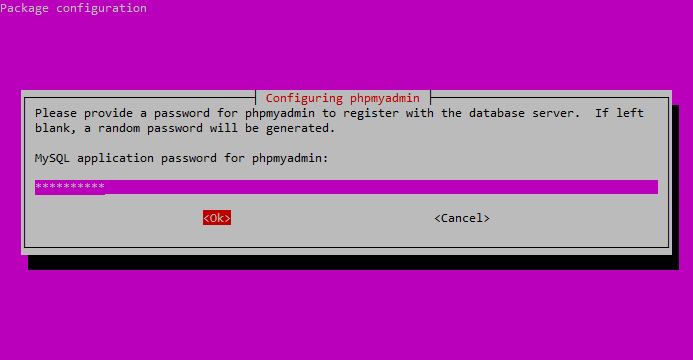
- You will be next asked to confirm the password by entering it again. Type the password you just created and hit the ENTER button while highlighting “OK”.
It will complete the installation process and add the phpMyAdmin configuration file to the following directory:
- /etc/apache2/conf-enabled/phpmyadmin.conf
Step 5: Enable PHP mcrypt Module and Restart the Apache Server
The installation and configuration of phpMyAdmin are completed here. However, you need to enable PHP mcrypt Module now.
To check if the mcrypt is already there use the following command
- php -m | grep mcrypt
If it doesn’t return anything, it means PHP mcrypt is not installed. You can install it using the following command:
- sudo php5enmod mcrypt
Now, you should once restart the Apache server so that the new changes will be applied. Use the following command to restart the Apache server:
- sudo service apache2 restart
Finally,
we have completed the installation and configuration of phpMyAdmin on our Linux system in five steps. Now you can log into your phpMyAdmin by going to your server address followed by /phpmyadmin.
- http://YOUR_SERVER_IP/phpmyadmin
On a localhost, the same can be accessed by using the address
- http://localhost/phpMyAdmin/
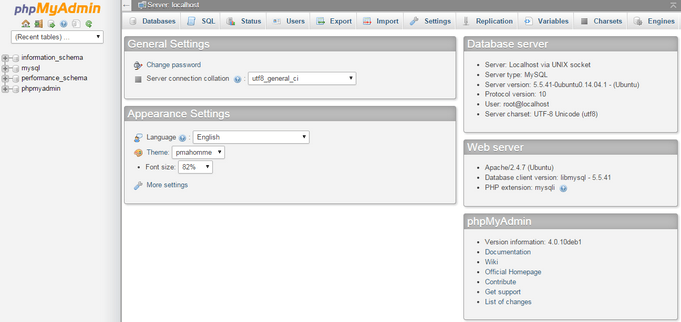
Log in with the root as user and provide the password that you created while the installation and you will find the following phpMyAdmin on your screen.
For more operations such as Zipping and unzipping files on Linux, How to edit files on Linux, or to know about Apache web server configuration files, you can take a look at our guides.
Leave a Reply